用树莓派+Astrobox远程控制3D打印机
标签:树莓派 3D打印机 Astrobox
飞鱼BH1JSS 发布于 2015-03-12 13:40
一家名为3DaGoGo的公司推出了一项名为AstroPrint的个人3D打印机管理解决方案,还曾经在Kickstarter上推广。AstroPrint包括了一个名为AstroBox的小盒子以及相应的软件。AstroBox有点像增强型的Raspberry Pi ModelB(512M RAM)。它的8G容量的SD上预装了定制的AstroPrint Pi软件。该软件是开源的,是Octoprint项目的一个大幅修改版本(Octoprint是一套让3D打印机不需要电脑控制,直接通过Web在线操控的植入式软件)。
AstroBox通过USB电缆与3D打印机连接。然后用户就不再需要把3D打印机直接连到自己的PC上了。AstroBox创建了一个WIFI接口,您可以通过任意的无线设备,如智能手机、平板电脑、个人电脑、笔记本电脑等与其连接,轻松操控您的3D打印机。
AstroPrint的功能还不止这些。AstroBox将连接到AstroPrint.com(尼玛要翻墙才能用),这是一个分层的云平台,它将提供STL文件智能切片功能,并生成可靠的G代码,据说切片速度超级快。AstroPrint将兼容目前市场上大多数的3D打印机,只要你的3D打印机有USB线,并使用G代码,那么就能与AstroPrint兼容。
如果你有一个树莓派Raspberry Pi,也可以不买AstroBox小盒,人家就是这么开放!!!可以下载AstroPrint固件,方便的用树莓派+无线网卡在你的手机、Pad上无线的、图形化的管理的你的3D打印机,多么良心的创客项目啊!
以下教程原文:http://www.instructables.com/id/Wireless-3D-Printing-Monitoring-using-Astroprint-a/
原作者:Audigi
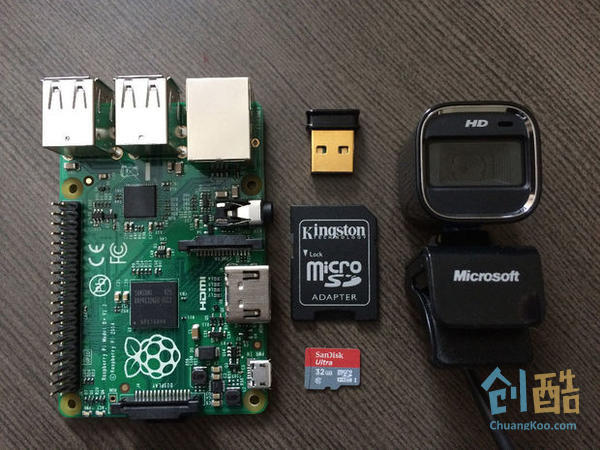
Step 1: 所需器材
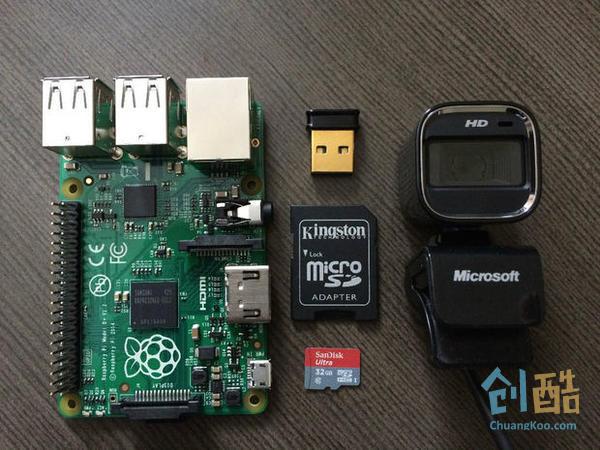
步骤1:所需器材
要求的器材见上图
3D打印机
Raspberry Pi 需要3个USB口(3D打印机,WiFi,摄像头),用USB HUB行不行我还没试过
TF卡以及读卡器、卡托什么的
WiFi USB适配器
USB摄像头
树莓派 5V电源适配器
需要的软件:
Win32 Disk Imger
SD Formatter
Astroprint软件(https://www.astroprint.com/downloads)
Step 2: 下载Astroprint软件
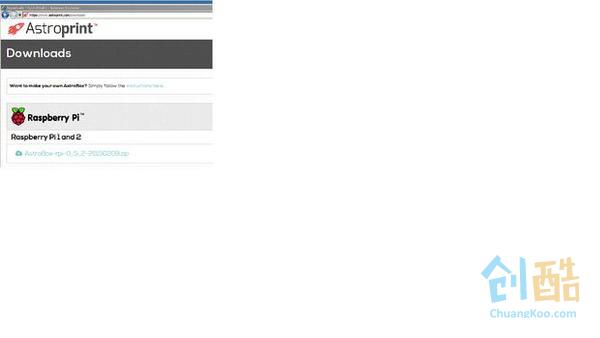
到这里 https://www.astroprint.com/downloads下载“astrobox-rpi-0_5_2-20150209。zip”或最新的软件,解压到一个文件夹。如果你没有一个帐户,您必须创建一个帐户。
Step 3: 解压下载的Zip包
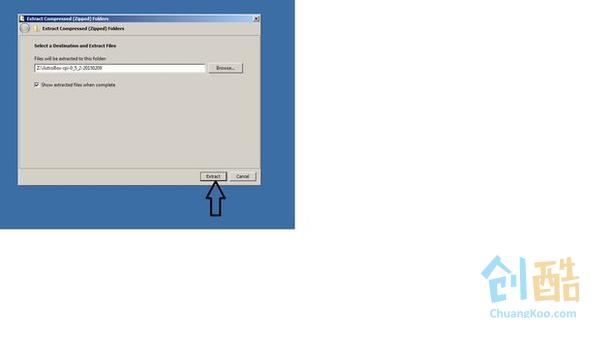
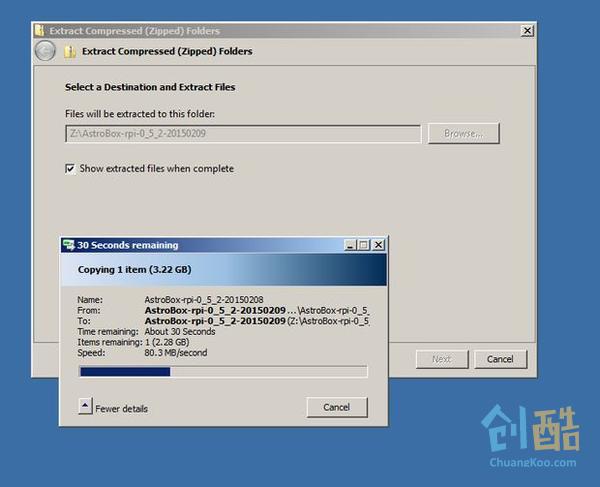
将下载的压缩包解压到一个文件夹中
Step 4: 格式化TF卡
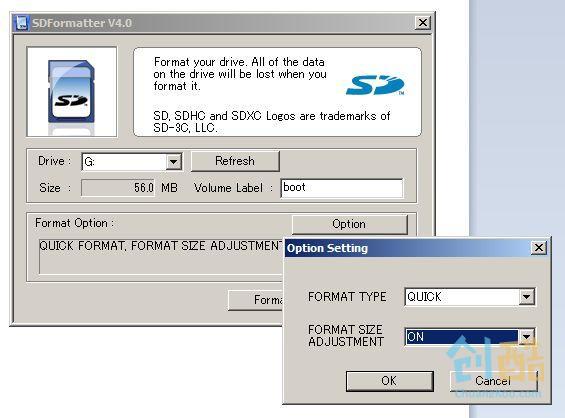
把TF卡套上卡托、读卡器差在你的电脑上,下SD卡格式化工具(https://www.sdcard.org/downloads/formatter_4/index.html)并选择正确的SD卡驱动的,选择格式大小选项,然后单击“format”。
Step 5: 将Astroprint固件写入TF卡
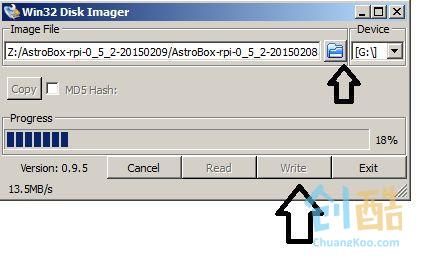
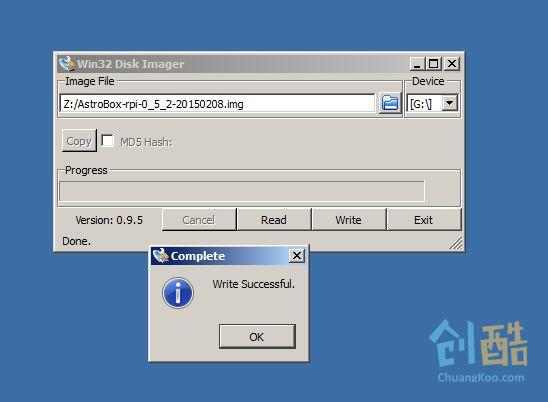
点击蓝色的文件夹按钮,来浏览并选择你下载的软件Astroprint固件img位置。选择正确的驱动器盘符,然后单击Write。写入大约3-5分钟。
Step 6: 安装SD卡和WiFi适配器
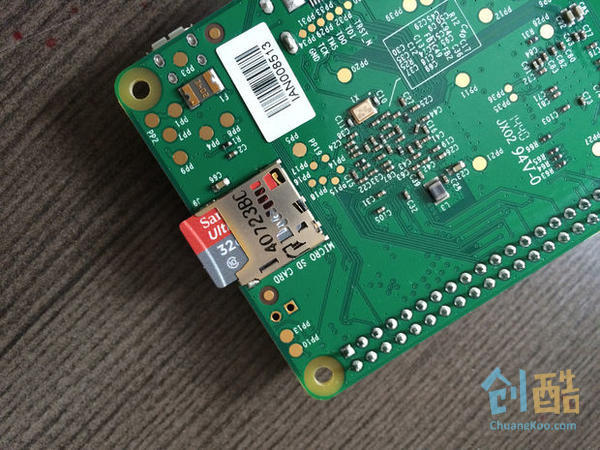
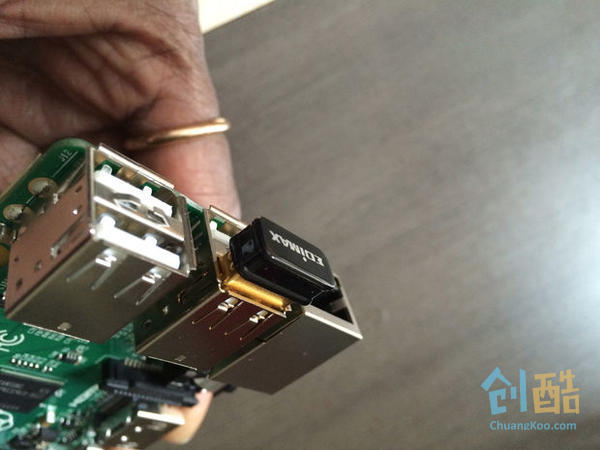
安装SD卡和WiFi适配器,如图所示为Raspberry Pi和连接电源。大约等待5分钟才会启动完成。
Step 7: 扫描WiFi,连接astrobox XX
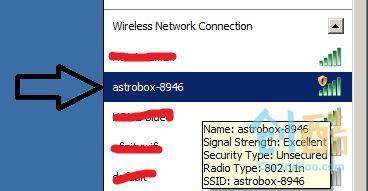
在PC、手机或平板上扫描的WiFi,看如果你看到你的WiFi列表中有一个叫做astrobox XXXX或XXXX astrobox热点,连接这个。这就是你的树莓派的热点。
Step 8: 连接到astrobox XXXX
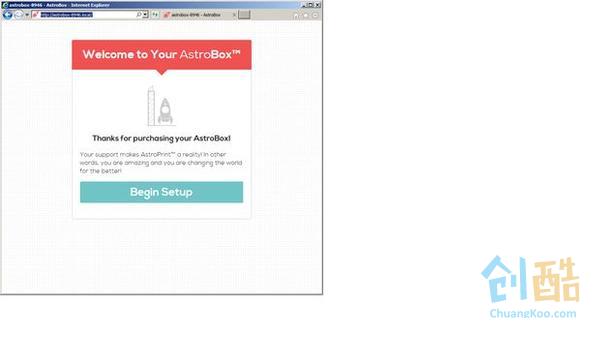
astrobox XXXX(4位的数字表示你的编号,这里显示的是astrobox-8946.local astrobox)
打开浏览器,在浏览器输入如图所示的网址http://astrobox-xxxx.local(请输入你刚才看到的热点的4位数字)并点击开始安装。
Step 9: 给你的Astrobox起个名字
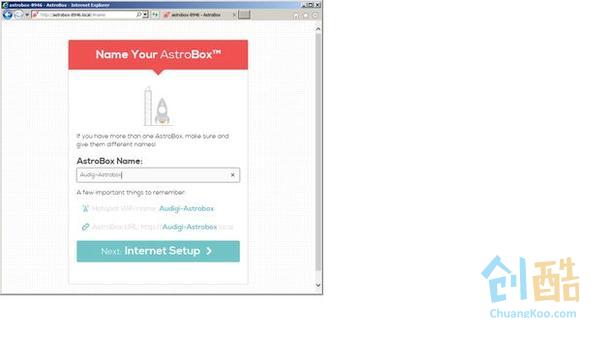
在这一步命名并记下你的Astrobox名字。
Step 10: 把Astrobox连接你家Wi-Fi网络
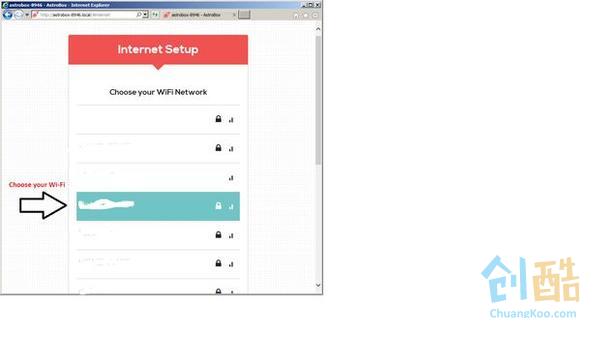
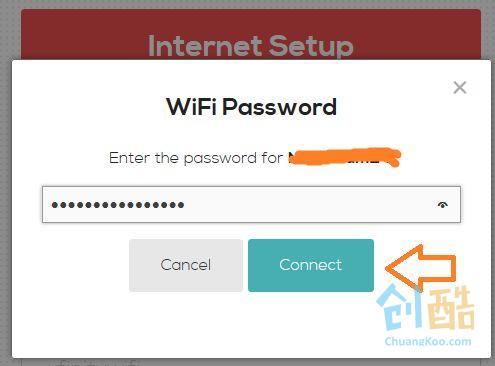
选择你家中的WiFi热点连接并输入密码,单击“连接”
Step 11: 步骤11:登录到您的Astroprint
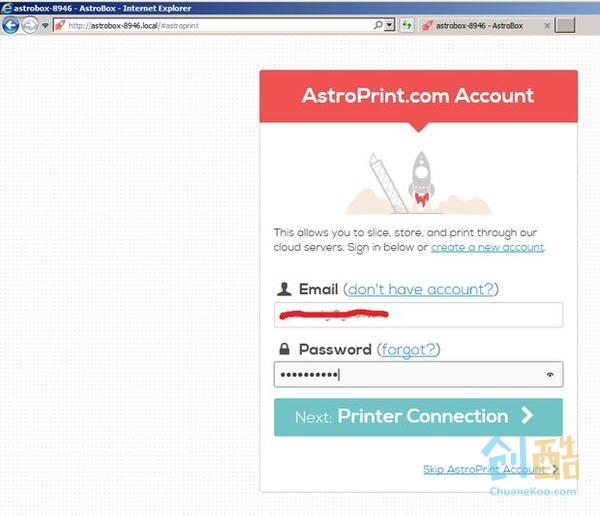
登录到你Astroprint的帐户,如果没有,就创建一个新帐户Astorpint。有免费和付费帐户两种。免费的就用起来很爽了,这样我们就可以连接我们的3D打印机了!
Step 12: 把Astrobox(就是你那个树莓派)连
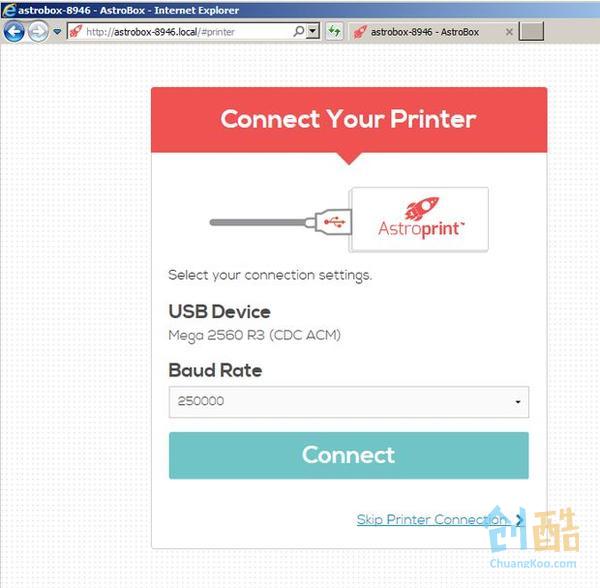
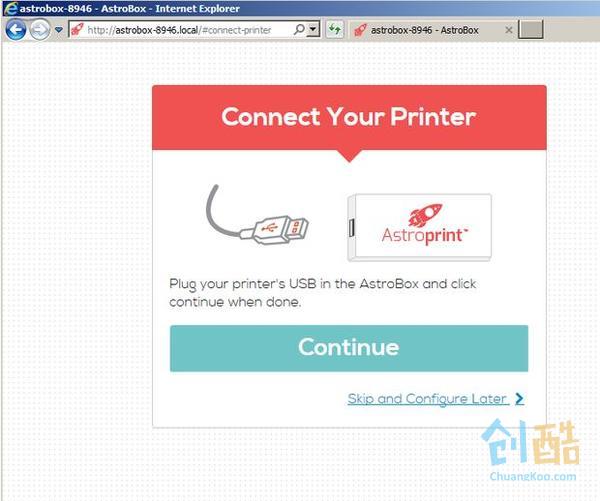
打开3D打印机电源,把3D打印机USB电缆连接Raspberry Pi上,单击“继续”。选择正确的波特率,单击“连接”。
Step 13: 检查3D打印机状态
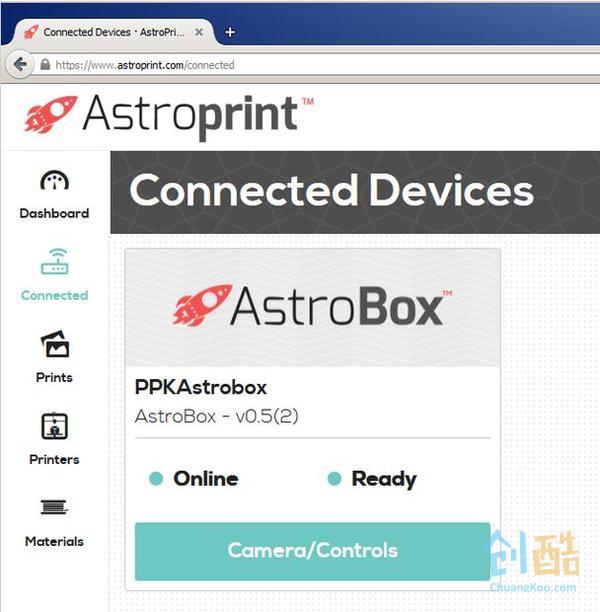
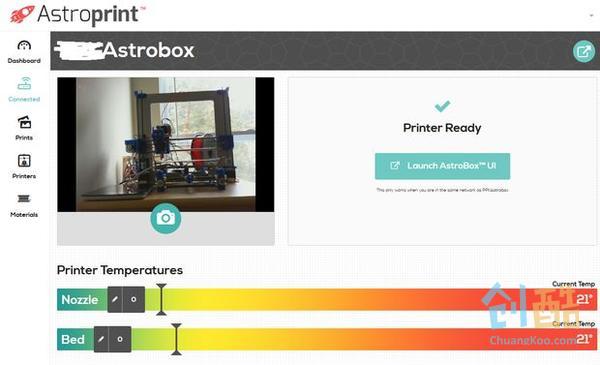
在连接设备点击查看你的Raspberry Pi astrobox。点击相机/控制,将打开一个不同的屏幕显示当前打印机的热床和喷嘴温度。如果你已连接了USB摄像头,需要调整一下拍摄角度,然后单击启动界面。
Step 14: 启动Astrobox UI

点击Astrobox UI窗口,你可以上传Gcode文件和STL文件,并点击打印Gcode文件最右边的打印机图标,它会根据你的Gcode文件,自动设置喷嘴温度和热床温度
Step 15: 确保你的Astrobox安全性
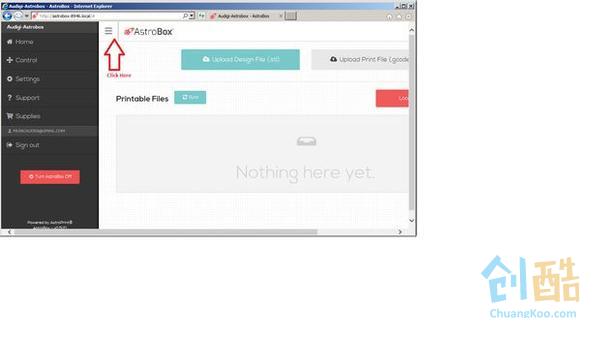
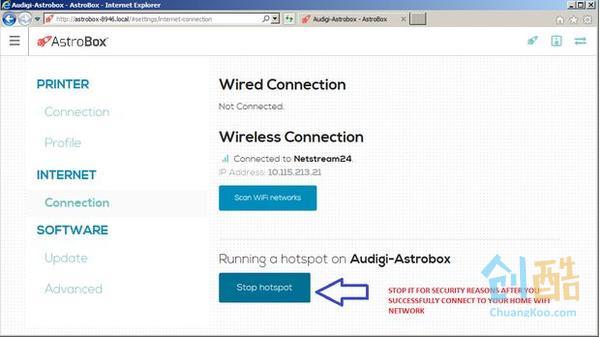
在Astrobox UI(单击窗口启动),点击上面所示,这将带来一个下拉菜单,选择设置。单击“Internet连接,单击停止热点。这样就让你的Raspberry Pi定制WiFi广播,别人也就无法连接到你的热点了。
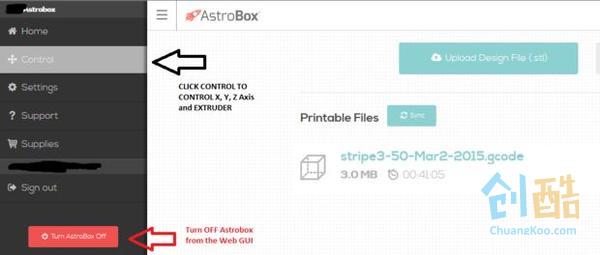
Step 16: 控制X,Y,Z轴和挤出机温度
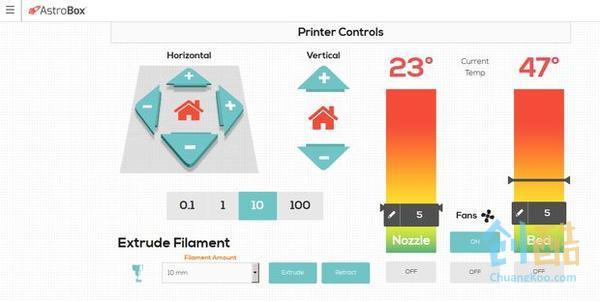
当你启动astrobox UI,你可以点击如图所示的图标,控制X,Y,Z轴和挤出温度等
Step 17: 安全的关闭

在UI界面,菜单滚动至底部,你可以优雅地关闭Astrobox,安全的拔下3D打印机。
登录以发表评论
作者的最新作品
-
怎样在创酷网发布一篇漂亮的DIY攻略 Ver1.0
2017-01-23 01:32发布
-
把激光切割机用起来——制作一个盒子
2017-01-22 17:35发布
-
用氦气球释放并回收一个飞上“太空”的摄像机
2015-04-14 13:21发布
-
每周一作(zuō) 开车也能发微信的手机神器
2015-04-02 14:24发布
-
用开源飞控套件做一架Mini四轴飞行器
2015-03-31 15:09发布
阅读数: 30377
